The first time I truly understood fried chicken, I was standing in my grandmother’s kitchen at seven years old, watching her work magic with nothing more than flour, buttermilk, and an old cast iron skillet that had seen decades of Sunday dinners. The chicken pieces bobbed in the golden oil like little islands of promise, each one crackling with a symphony that spoke of comfort and tradition. She never measured anything, just sprinkled seasonings with the confidence of someone who had perfected this dance a thousand times before. The aroma filled every corner of that small kitchen, carrying with it the weight of family gatherings and celebrations yet to come. When she finally lifted those golden-brown pieces from the oil, the crust shattered at first bite, revealing the most tender, juicy meat I had ever tasted. That moment taught me that great fried chicken isn’t just about technique – it’s about understanding the relationship between time, temperature, and patience. Every piece tells a story of careful preparation and unwavering attention, transforming humble ingredients into something extraordinary that brings people together around the table.
This crispy fried chicken recipe honors that tradition while embracing the practicality of modern home cooking. What makes this version special is the double-dredge technique combined with a carefully balanced buttermilk brine that ensures each piece emerges from the oil with an impossibly crunchy exterior and succulent interior. The secret lies in understanding how moisture, seasoning, and heat work together to create that perfect contrast of textures. This isn’t just dinner – it’s a celebration of one of America’s most beloved comfort foods, designed to create new memories while honoring old ones.
Table of Contents
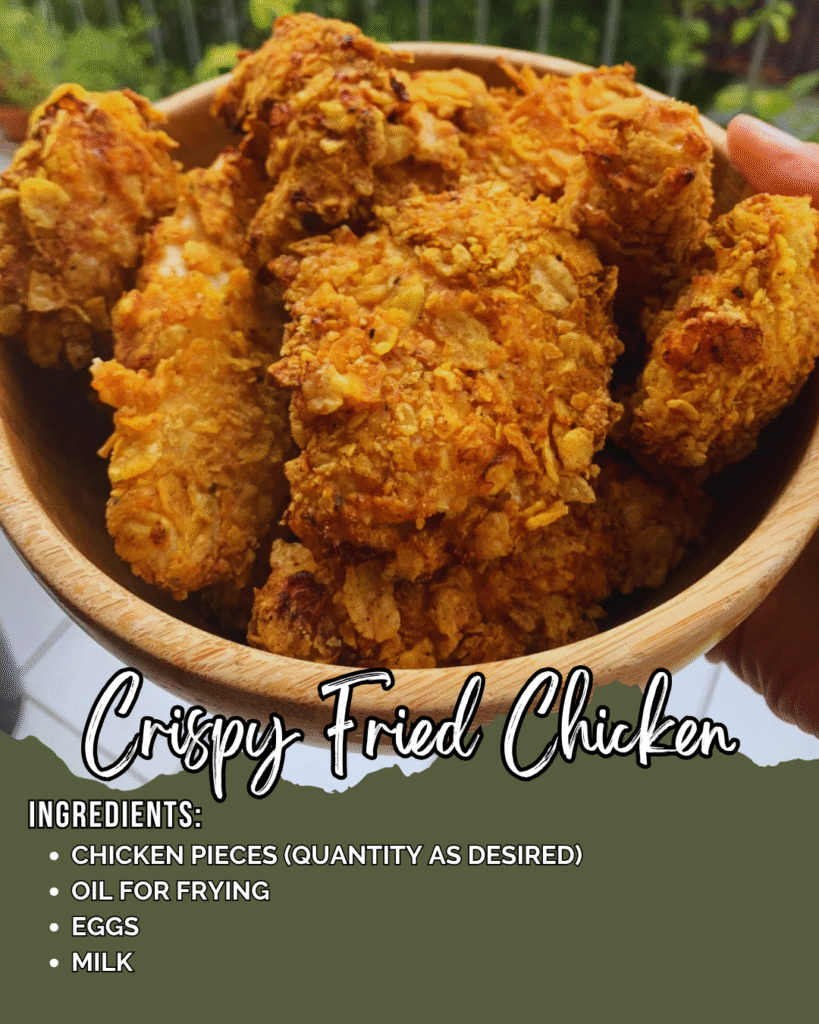
Ingredients
For the Brine:
- 2 cups buttermilk
- 2 tablespoons kosher salt
- 1 tablespoon hot sauce
- 1 teaspoon garlic powder
- 1 teaspoon onion powder
For the Chicken:
- 1 whole chicken (3-4 pounds), cut into 8 pieces
- Or 2 pounds mixed chicken pieces (thighs, drumsticks, breasts)
For the Coating:
- 2 cups all-purpose flour
- 1 tablespoon paprika
- 2 teaspoons garlic powder
- 2 teaspoons onion powder
- 2 teaspoons dried thyme
- 1 teaspoon cayenne pepper
- 1 teaspoon black pepper
- 2 teaspoons kosher salt
- 1/2 teaspoon dried sage
For Frying:
- 6-8 cups vegetable oil (or enough for 3-inch depth)
Instructions
Begin this journey the night before you plan to serve, or at minimum four hours ahead. In a large bowl, whisk together the buttermilk, salt, hot sauce, garlic powder, and onion powder until the salt completely dissolves. This isn’t just a marinade – it’s a transformation chamber where tough proteins break down and flavors penetrate deep into the meat. Submerge your chicken pieces completely, ensuring every surface touches this tangy elixir. The buttermilk’s acidity works like a gentle massage, tenderizing while imparting a subtle tang that will later marry beautifully with the seasoned flour.
Cover and refrigerate, allowing time to work its quiet magic. During this waiting period, enzymes in the buttermilk are busy breaking down proteins, while the salt draws out moisture only to replace it with seasoned liquid. This process creates chicken that cooks more evenly and stays incredibly moist inside its crispy shell.
When you’re ready to cook, remove the chicken from the refrigerator thirty minutes before frying. This step matters more than most people realize – cold chicken dropped into hot oil creates dangerous splattering and uneven cooking. Room temperature chicken enters the oil more gently, allowing the crust to form gradually while the interior heats evenly.
Prepare your coating by whisking together flour and all the spices in a wide, shallow dish. This isn’t just seasoned flour – it’s armor for your chicken. Each spice plays a specific role: paprika adds color and mild sweetness, garlic and onion powder provide savory depth, thyme brings earthy complexity, cayenne delivers gentle heat, and sage adds an unexpected herbal note that elevates the entire blend. The flour itself becomes a canvas, absorbing flavors from the buttermilk-soaked chicken while creating that coveted crispy texture.
Pour oil into a heavy-bottomed Dutch oven or deep cast iron skillet, reaching a depth of at least three inches. Heat slowly to 350°F, monitoring carefully with a thermometer. Oil temperature is the make-or-break moment for perfect fried chicken. Too hot, and the exterior burns before the interior cooks through. Too cool, and the coating becomes greasy instead of crispy. That magic number of 350°F creates the perfect environment for the Maillard reaction – the chemical process that creates those beautiful golden-brown colors and complex flavors.
Remove chicken pieces from the buttermilk, allowing excess to drip off but leaving enough moisture clinging to the surface. This residual buttermilk acts as glue for your seasoned flour coating. Working with one piece at a time, dredge thoroughly in the seasoned flour, pressing gently to ensure complete coverage. The flour should cling to every curve and crevice, creating an even coating that will transform into that desired crunchy shell.
Here comes the secret that separates good fried chicken from extraordinary: the double dredge. Dip each floured piece back into the buttermilk briefly, then immediately back into the seasoned flour. This creates multiple layers of coating that fry up incredibly crispy and stay crunchy longer. The extra coating also provides more protection for the meat inside, ensuring it stays juicy while developing that perfect golden exterior.
Carefully lower chicken pieces into the hot oil, working in batches to avoid overcrowding. The oil should bubble enthusiastically around each piece but not violently – that’s your indication the temperature is just right. Overcrowding drops the oil temperature, leading to greasy, soggy coating. Give each piece plenty of space to fry properly, maintaining at least an inch between pieces.
Fry for 12-15 minutes per batch, turning pieces once halfway through cooking. Listen to the oil – it should maintain a steady, gentle sizzle throughout the cooking process. If the bubbling becomes too aggressive, reduce heat slightly. If it becomes too quiet, increase heat to maintain 350°F. Dark meat pieces like thighs and drumsticks need the full fifteen minutes, while breast pieces might finish in twelve. The internal temperature should reach 165°F, but visual cues work well too – properly cooked chicken will be deep golden brown with juices running clear when pierced.
Remove finished pieces to a wire rack set over a baking sheet, never to paper towels which can steam the bottom and soften that precious crust. The wire rack allows air to circulate around each piece, keeping the coating crispy while excess oil drains away. If you need to keep pieces warm while finishing subsequent batches, place the rack and baking sheet in a 200°F oven.
Chef’s Notes
The beauty of great fried chicken lies in patience and attention to detail. Don’t rush the brining process – longer is always better. The coating can be prepared days ahead and stored in an airtight container. For extra heat lovers, increase cayenne to taste, or add a pinch of white pepper for a different kind of warmth. Leftover chicken keeps well refrigerated for three days and can be reheated in a 375°F oven for 8-10 minutes to restore crispiness. For gatherings, chicken can be partially fried earlier in the day and finished just before serving.
Serves: 4-6 people
Total Time: 4+ hours (including brining), 45 minutes active cooking