The first time I truly understood the power of a meat pie, I was standing in my grandmother’s kitchen on a grey October afternoon, watching her weathered hands work magic with simple ingredients. Steam rose from the golden pastry as she lifted it from the oven, and the aroma that filled that small kitchen told a story of generations—of Sunday dinners, family gatherings, and the kind of love that gets baked into every flaky layer.
My grandmother never measured anything, yet her meat pies were legendary in our family. She’d brown ground beef with onions until the kitchen windows fogged with savory steam, then add her “secret” ingredients—which weren’t secret at all, just pantry staples combined with the intuition that comes from decades of feeding people you love. The filling would simmer while she rolled out pastry that somehow always emerged perfectly tender, never tough. Watching her work was like witnessing culinary poetry in motion.
That memory lives in every meat pie I make now, a bridge between past and present that transforms humble ingredients into something extraordinary. There’s profound satisfaction in creating a complete meal wrapped in pastry—protein, vegetables, and comfort all contained within golden walls that promise warmth and nourishment.
Table of Contents
What Makes This Meat Pie Special
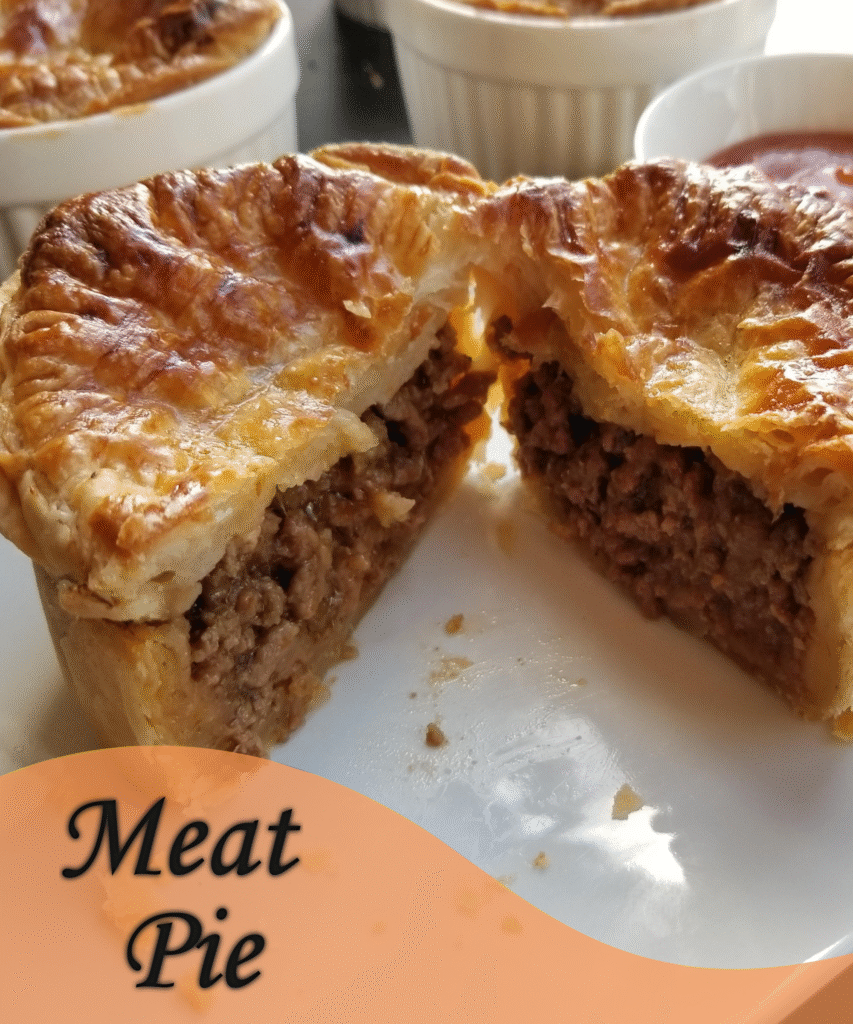
This isn’t just any meat pie recipe; it’s a celebration of home cooking at its finest. The filling achieves that perfect balance between hearty and refined, with tender ground beef enriched by aromatic vegetables and herbs. The pastry strikes that coveted sweet spot between flaky and sturdy—delicate enough to complement the filling, strong enough to hold everything together. What makes this version particularly wonderful is how the flavors develop during baking, creating layers of taste that reveal themselves with each bite. It’s comfort food that doesn’t compromise on technique or flavor complexity.
Ingredients
For the Pastry:
- 2½ cups all-purpose flour
- 1 teaspoon salt
- ¾ cup cold unsalted butter, cubed
- 1 large egg
- 3-4 tablespoons ice water
For the Filling:
- 1½ pounds ground beef (80/20 blend)
- 1 large onion, finely diced
- 2 carrots, diced small
- 2 celery stalks, diced small
- 3 cloves garlic, minced
- 2 tablespoons tomato paste
- ¼ cup all-purpose flour
- 1½ cups beef broth
- 1 cup frozen peas
- 2 teaspoons Worcestershire sauce
- 1 teaspoon fresh thyme leaves
- 1 bay leaf
- Salt and black pepper to taste
- 2 tablespoons vegetable oil
For Assembly:
- 1 egg, beaten (for egg wash)
Step-by-Step Instructions
Begin with the pastry, because good things take time and patience. In a large bowl, whisk together flour and salt—this simple act of combining creates the foundation for pastry magic. Add the cold butter cubes, and here’s where technique matters. Using your fingertips or a pastry cutter, work the butter into the flour until the mixture resembles coarse breadcrumbs with some pea-sized butter pieces still visible. These butter pieces are your future flakiness, so don’t overwork the mixture.
Create a well in the center and add the beaten egg. The egg acts as both binder and enricher, contributing to that beautiful golden color we’re after. Gradually add ice water, one tablespoon at a time, mixing gently with a fork until the dough just begins to hold together. You’ll know it’s ready when you can squeeze a handful and it holds without being sticky. Divide the dough into two portions—one slightly larger for the bottom crust—wrap in plastic, and refrigerate for at least thirty minutes. This rest period allows the gluten to relax and the butter to firm up.
While the pastry chills, focus on building layers of flavor in your filling. Heat vegetable oil in a large, heavy-bottomed pan over medium-high heat. The oil should shimmer but not smoke—this indicates the perfect temperature for browning. Add the ground beef, breaking it apart with a wooden spoon. Let it brown undisturbed for a few minutes before stirring; this initial searing creates those deeply flavorful caramelized bits that elevate the entire dish.
Once the beef develops a beautiful brown crust, push it to one side of the pan and add the diced onion to the cleared space. This technique prevents overcrowding and ensures even cooking. The onion will sizzle and begin to soften, releasing its sweet aroma. After about three minutes, add the carrots and celery, stirring everything together. These vegetables provide textural contrast and subtle sweetness that balances the rich meat.
Cook the vegetable mixture until the onions become translucent and the carrots begin to soften—about five minutes. The kitchen should smell incredible at this point, filled with the foundational aromas of good cooking. Add minced garlic and cook for another minute until fragrant, being careful not to let it burn.
Stir in tomato paste, coating everything evenly. Cook for two minutes, allowing the tomato paste to deepen in color and develop its concentrated flavor. This step is crucial—raw tomato paste tastes harsh, but cooked tomato paste adds richness and umami depth.
Sprinkle flour over the mixture and stir constantly for one minute. This creates a roux that will thicken our filling and prevent it from being too wet inside the pastry. Gradually add beef broth while stirring constantly to prevent lumps from forming. The mixture will thicken as it comes to a simmer.
Add Worcestershire sauce, thyme, and bay leaf. Season generously with salt and pepper—remember, this filling needs to be well-seasoned because pastry can mute flavors. Let the mixture simmer for ten minutes, stirring occasionally, until it reaches a rich, thick consistency that coats the back of a spoon. Stir in frozen peas during the last minute of cooking—they’ll finish cooking in the oven and maintain their bright color and texture. Remove the bay leaf and let the filling cool completely.
Preheat your oven to 425°F. On a lightly floured surface, roll out the larger portion of pastry into a circle about twelve inches in diameter. Transfer it to a nine-inch pie dish, letting the excess hang over the edges. The pastry should drape naturally without stretching—stretched pastry shrinks during baking.
Fill the pastry-lined dish with the cooled meat mixture, mounding it slightly in the center. Roll out the remaining pastry for the top crust, then carefully place it over the filling. Trim both crusts to leave about a half-inch overhang, then fold the top crust under the bottom crust edge and crimp decoratively to seal.
Cut several small vents in the top crust—these allow steam to escape and prevent the pastry from becoming soggy. Brush the entire surface with beaten egg wash for that gorgeous golden finish we’re after. The egg wash creates a beautiful sheen and helps the pastry achieve an appetizing color.
Bake for thirty to thirty-five minutes, until the pastry is golden brown and you can hear the filling bubbling gently inside. If the edges brown too quickly, cover them with strips of aluminum foil. The finished pie should sound slightly hollow when tapped and feel firm to gentle pressure.
Let the pie rest for at least ten minutes before cutting. This resting period allows the filling to set up and makes serving much neater and more attractive.
Chef’s Notes
The key to preventing soggy bottom pastry is ensuring your filling is completely cool before assembly and pre-baking isn’t necessary with this recipe. For make-ahead convenience, assemble the pie completely and freeze unbaked for up to three months—bake directly from frozen, adding ten to fifteen minutes to the cooking time. Leftover pie keeps beautifully in the refrigerator for three days and reheats well in a low oven. For variation, try adding mushrooms to the filling or substituting ground lamb for a more robust flavor profile.
Serves: 6-8 people
Total Time: 2 hours (including chilling time)