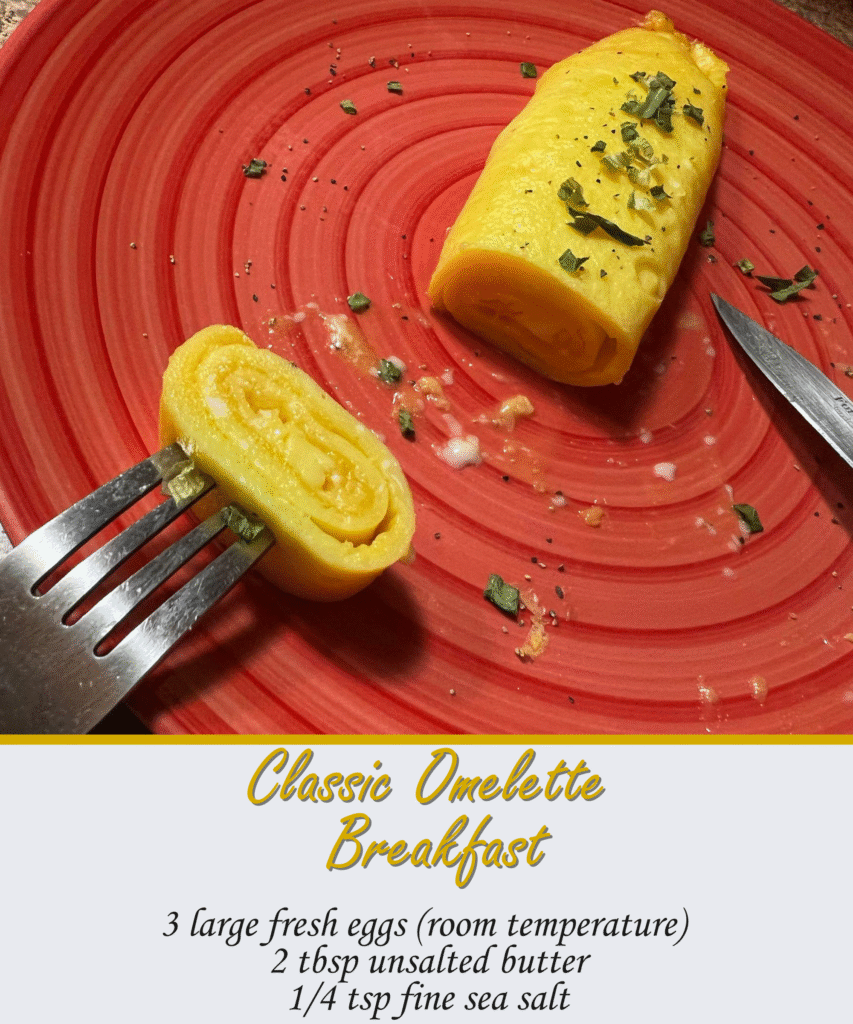
The morning sun streamed through my kitchen window as I reached for the carton of farm-fresh eggs, their shells still carrying traces of hay from yesterday’s farmers market visit. There’s something profoundly satisfying about starting the day with an omelette – not just any scrambled eggs hastily thrown together, but a proper French omelette that transforms humble ingredients into something approaching art. My grandmother taught me this technique during summer visits to her cottage, where she’d crack eggs with the confidence of someone who had fed three generations of hungry mouths. The sound of butter hitting a warm pan, the gentle whisper of eggs meeting heat, the careful fold that creates silky, custard-like curds – these moments have become my morning meditation. What began as necessity during my college years has evolved into a cherished ritual, a way of honoring both the ingredients and the craft that connects us to countless breakfast tables throughout history.
This classic omelette represents the perfect marriage of technique and simplicity, where three basic ingredients transform into something far greater than their sum. The secret lies not in complexity but in understanding heat, timing, and the gentle coaxing of eggs into their most luxurious form. You’ll discover that mastering this fundamental technique opens doors to countless variations while providing a reliable foundation for those mornings when you crave something both nourishing and elegant.
Table of Contents
Ingredients
Main Components:
- 3 large fresh eggs, room temperature
- 2 tablespoons unsalted butter
- 1/4 teaspoon fine sea salt
- Freshly cracked black pepper to taste
Optional Fillings:
- 2 tablespoons fresh chives, finely chopped
- 1/4 cup grated Gruyère cheese
- 2 tablespoons crème fraîche

Instructions
Begin by allowing your eggs to reach room temperature – this seemingly small detail makes an enormous difference in achieving the silky texture we’re seeking. Cold eggs straight from the refrigerator create uneven cooking and a less cohesive final result. While they warm, I often prepare my mise en place, arranging ingredients like a painter setting up their palette.
Crack the eggs into a bowl with the precision of someone handling something precious. Notice how room temperature eggs flow more smoothly, creating fewer bubbles that might interrupt our omelette’s eventual silk-like surface. Add the salt and pepper, then whisk with a fork in quick, confident strokes. The goal isn’t to create a foam but to fully combine the whites and yolks into a unified, golden mixture. I count about thirty swift strokes – enough to marry the components without overworking them.
Heat an 8-inch non-stick pan over medium-low heat. This temperature control is crucial; too high and you’ll have tough, rubbery eggs before the inside sets properly. Add one tablespoon of butter and watch it melt slowly, coating the pan’s surface. The butter should foam gently and smell nutty but never brown or sizzle aggressively. This visual and aromatic cue tells you the temperature is perfect.
Pour the eggs into the center of the pan, and here’s where the magic begins. Using a silicone spatula, gently stir the eggs while simultaneously shaking the pan in small, circular motions. This constant, gentle agitation prevents the bottom from setting too quickly while ensuring even cooking throughout. The eggs will begin forming soft, custardy curds that look almost like loose scrambled eggs. Continue this process for about 45 seconds to one minute, until the eggs are still quite wet but beginning to hold together.
Stop stirring and let the omelette rest for 30 seconds, allowing the bottom to set while the top remains slightly runny. This is the moment that separates good cooks from great ones – resisting the urge to keep fussing and trusting the gentle heat to finish its work. If you’re adding cheese or herbs, sprinkle them over half of the omelette now, while the surface is still slightly wet enough to help them adhere.
The fold requires confidence and a gentle touch. Using your spatula, lift one edge of the omelette and fold it over itself, creating a half-moon shape. The residual heat will continue cooking the interior while the exterior develops a beautiful, pale golden color. Add the remaining tablespoon of butter to the pan, tilting to coat the surface beneath the omelette – this final butter addition creates an almost lacquered finish.
Slide the omelette onto a warm plate, seam-side down. The entire cooking process should take no more than two to three minutes from the moment eggs hit the pan. A properly executed omelette should be pale golden on the outside with a creamy, barely-set interior that continues to cook gently from residual heat even after plating.
Chef’s Notes
Temperature control is your greatest ally in omelette mastery. If you find your eggs cooking too quickly, don’t hesitate to lift the pan off the heat momentarily. The pan retains enough heat to continue the gentle cooking process. Fresh eggs make a noticeable difference in both flavor and texture, while the quality of your butter will shine through in the final dish. This technique, once mastered, becomes second nature and can accommodate endless variations from herbs and cheese to seasonal vegetables or leftover roasted meats.
Servings: 1 generous portion
Total Time: 5 minutes