The first time I encountered a proper chocolate traybake was at my neighbor Mrs. Henderson’s kitchen table on a rainy Tuesday afternoon. I was eight years old, soaked through from walking home without an umbrella, and she pulled this magnificent rectangular cake from her ancient Aga oven. The smell hit me first – rich, deep chocolate mingling with the faint vanilla steam rising from the surface. She cut me a generous square, still warm, the glossy chocolate icing barely set and threatening to slide right off the tender crumb beneath. That first bite was revelation: dense but not heavy, sweet but complex, with a fudgy texture that seemed to melt and chew simultaneously. Mrs. Henderson watched me devour that piece with the satisfied smile of someone who understood that good cake could fix almost anything, including a soggy school uniform and a bruised eight-year-old ego.
Years later, when I finally coaxed the recipe from her (along with strict instructions about proper oven temperatures and the importance of real butter), I discovered that traybakes represent everything wonderful about unpretentious baking. No fancy techniques, no temperamental layers to worry about – just honest ingredients transformed through gentle heat into something that brings people together around kitchen tables.
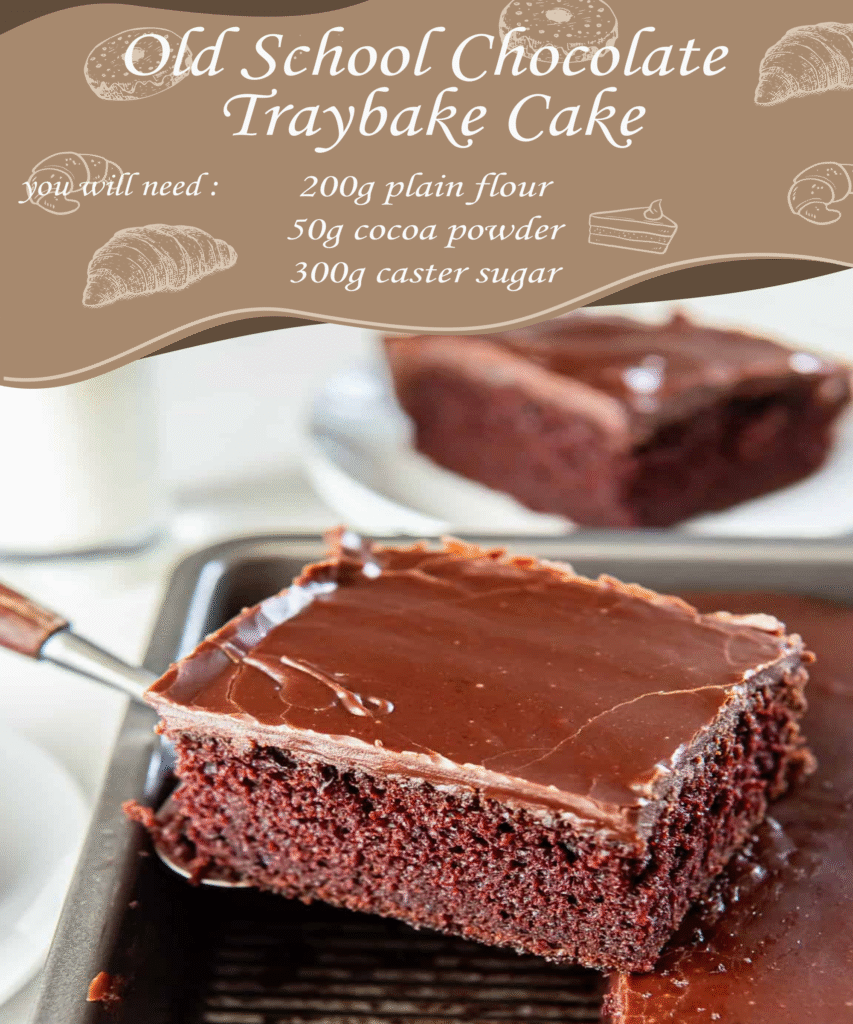
This chocolate traybake embodies old-fashioned baking at its finest. Unlike fussy layer cakes that demand precision and patience, this beauty comes together in one bowl, bakes in a single pan, and delivers consistent results every time. The texture strikes that perfect balance between brownie and sponge cake, while the simple chocolate icing adds just enough sweetness without overwhelming the rich cocoa base. It’s the kind of cake that improves with age, staying moist for days and developing deeper flavors as it sits.
Ingredients:
For the cake:
- 200g plain flour
- 50g cocoa powder
- 300g caster sugar
- 200g butter, melted
- 4 large eggs
- 2 teaspoons vanilla extract
- 1 teaspoon baking powder
- 1/2 teaspoon salt
- 150ml whole milk
For the chocolate icing:
- 100g butter, softened
- 200g icing sugar
- 30g cocoa powder
- 3-4 tablespoons whole milk
- 1 teaspoon vanilla extract
Begin by heating your oven to 180°C and generously buttering a 33x23cm traybake tin. I always line mine with parchment paper too, leaving some overhang for easy removal later – trust me on this one. There’s nothing quite like the disappointment of a perfect cake that refuses to leave its pan gracefully.
Sift your flour, cocoa powder, baking powder, and salt into a large mixing bowl. This might seem unnecessary, but cocoa powder has a tendency to form stubborn lumps that no amount of whisking will eliminate once wet ingredients join the party. The sifting creates a light, airy base that translates directly to your final texture.
In a separate bowl, whisk together the melted butter and caster sugar until well combined. The mixture should look slightly glossy and feel smooth when rubbed between your fingers. Add the eggs one at a time, beating well after each addition. This gradual incorporation prevents the mixture from splitting – a common traybake tragedy that results in a dense, heavy cake rather than the tender crumb we’re after.
Pour in the vanilla extract and give everything a final whisk. The aroma at this stage is pure promise: sweet butter and vanilla creating the foundation for chocolate magic to come.
Create a well in your dry ingredients and pour in the wet mixture. Using a large wooden spoon or spatula, fold everything together gently but thoroughly. Add the milk gradually, stirring until you achieve a smooth batter that falls easily from your spoon. The consistency should remind you of thick double cream – pourable but substantial.
Pour the batter into your prepared tin, using a palette knife to spread it evenly into the corners. Give the tin a gentle tap on your work surface to release any air bubbles. The batter should settle into a smooth, even layer that barely reaches the halfway point of your tin – this cake rises modestly but consistently.
Slide the tin into your preheated oven and set your timer for 25 minutes. Resist the urge to open the oven door during the first 20 minutes – the gentle, even heat needs time to work its magic without interference. You’ll know it’s ready when the surface springs back lightly when touched and a skewer inserted into the center comes out with just a few moist crumbs clinging to it.
While the cake cools completely in its tin, prepare the icing by beating the softened butter until light and fluffy. Gradually add the icing sugar and cocoa powder, alternating with splashes of milk until you achieve a smooth, spreadable consistency. The icing should hold its shape when dolloped but spread easily across the cake surface.
Once the cake reaches room temperature, spread the icing evenly across the top using a palette knife or the back of a spoon. I like to create gentle swirls rather than a perfectly smooth surface – it adds character and catches the light beautifully when served.
Chef’s Notes:
This cake actually improves over the first day or two, as the flavors meld and the texture becomes more fudgy. Store covered at room temperature for up to five days, though it rarely lasts that long in my house. For extra indulgence, try adding a handful of chocolate chips to the batter or a sprinkle of sea salt over the finished icing. The recipe doubles beautifully for larger gatherings – just use a bigger tin and extend the baking time by 10-15 minutes.
Serves: 15-20 generous squares
Total time: 45 minutes (plus cooling time)